Data Binding
Data Binding is binding controls to data from the database. With data binding we can bind a control to a particular column in a table from the database or we can bind the whole table to the data grid. Data binding provides simple, convenient, and powerful way to create a read/write link between the controls on a form and the data in their application. Windows Forms supports binding data to ADO .NET DataSet, Array, ArrayList, etc. A control can be bound to any collection that supports indexed access to the elements in that collection.
Simple Data Binding
Simple binding allows us to display one data element from a table in a control. Simple binding is managed by use of the Bindings collection on each control. Simple bound controls show only one data element at a time. We have to create our own navigation controls (buttons) to see other data elements. These navigation controls allow us to move from record to record by clicking buttons and the data in the bound controls will be updated automatically. To bind any property of a control, you need to click the ellipse button of the Advanced property under Data Bindings property in the properties window. Clicking on the ellipse opens up Advanced Data Binding Dialog in which we can bind any property of a control to a data source.
Working with Example
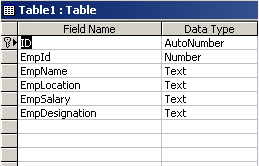
To understand Simple Binding we will create a simple data entry form and work with it. We will create our own table in Access and access data from that table with a Form. To start, open a blank database in MS Access, name it as Emp and save it in the C: drive of your machine. Create a table, Table1 with the following columns, EmpId, EmpName, EmpLocation, EmpSalary and EmpDesignation. The columns and their data types should look like the image below.
Once you finish creating the table with required columns, enter some values and close it. Get back to Visual Studio, open a new Windows Form and from the toolbox add five TextBoxes, five Labels and eight Buttons. Here, we will bind data from the table we created in Access to TextBoxes. TextBox1 will display EmpId, TextBox2 will display EmpName, TextBox3 will display EmpLocation, TextBox4 will display EmpSalary and TextBox5 will display EmpDesignation. The image below displays the form in design view.
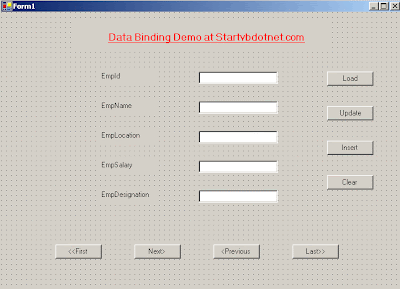
Set the text and name property of all the buttons as shown above in the properties window. Now, in the toolbox, click the Data tab and drag an OleDbConnection object onto the form. The image below displays items from the Data tab.
href="https://blogger.googleusercontent.com/img/b/R29vZ2xl/AVvXsEjG77l3rMbu6X2jfqU316Pm3kSXtAt4h7EpBukx4kj5VJwdF5xOiFyPoN-GYvJnvO4ek1J61_r7AYbjTm8Vr71JEUxRavbl7Shek9dOo7_nY2-iJagRythVJTKN6w9ujfNV0DoiFLBHHzB6/s1600-h/sb3.gif">
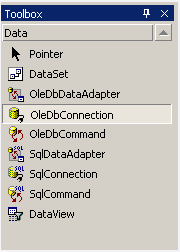
Once the connection object is added to the component tray, open it's properties window to set the connection string. Select ConnectionString property in the properties window, click on the drop-down arrow and select
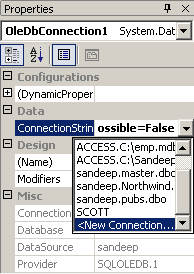
When you select
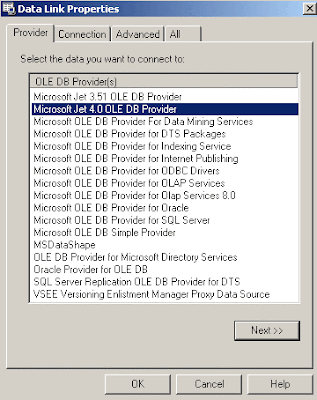
Clicking next takes you to Connection tab. Here, browse for Emp.mdb database in the selection area by clicking the ellipse button and click "Test Connection" button. If connection succeeds, it displays a message box stating that the connection succeeded. The image below displays that.
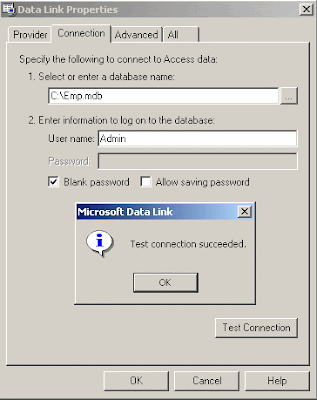
Once you are done with it, click OK. Until this point we created a Connection object that knows how to connect to the database. We still need other objects that will make use of this connection. Get back to the Data tab in toolbox and drag an OleDbDataAdapter tool onto the Form. This adds a new data adapter to the form and automatically starts the Data Adapter Configuration Wizard. You can view configuration of data adapter here. After you finish configuring the data adapter we need to create a Dataset.
continue reading
No comments:
Post a Comment