Visual Basic also allows us to work with DataBinding with it's built-in feature "Data Form Wizard". We will have a look at how we can create our own data-entry forms with the Data Form Wizard. A Data Form Wizard is the easiest and fastest way to develop database applications without writing a single line of code. We will create a form and work with Order Details table from the sample Northwind database in SQLServer. To start working, select Project->Add New Item->Data Form Wizard from the main menu. The dialogue box for that looks like the image below.
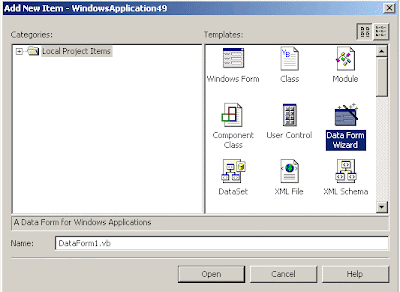
After selecting Data Form Wizard, click Open. The new pane that opens is the DataForm Wizard and it looks like the image below.
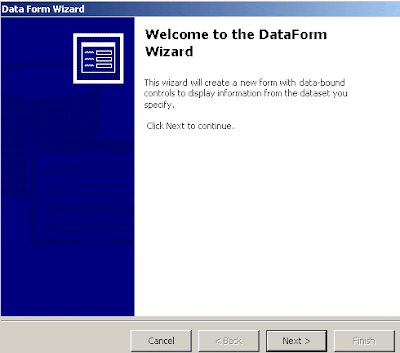
Click Next on this pane. Clicking next takes you to a new pane which looks like the image below. Here you need to specify the name for your DataSet.
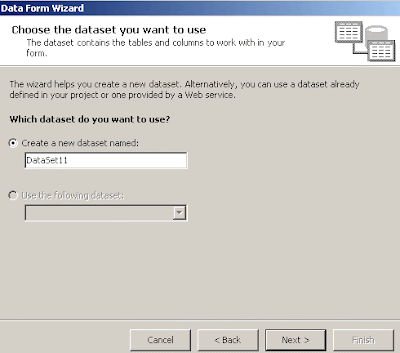
Here, select the radio button that displays "Create a new dataset named", type a name for the DataSet, and click next. Clicking next opens a pane like the image below.
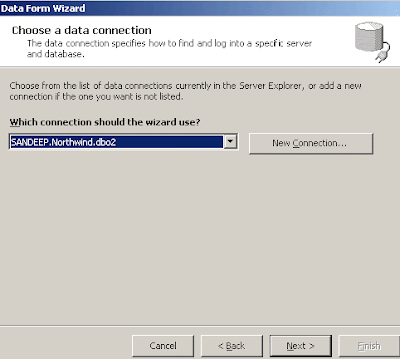
Here we need to establish a connection to the database. Click on the "New Connection" button to open the "Data Link Properties" window. Set a connection to the database in the Data Link properties window. Here, I am using Northwind database. You can use any database you wish to work with. If you already have a connection you can use it. Once you finish with the Connection, click next. Clicking next takes you to a new pane like the image below.
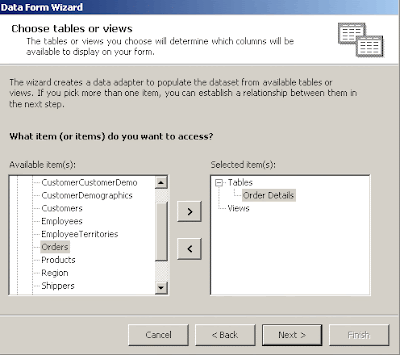
This pane displays all the tables available in Northwind database. Select the table you want to work and add it using the forward arrow button. I am selecting the Order Details table. Click next once you are finished. The next pane looks like the image below.
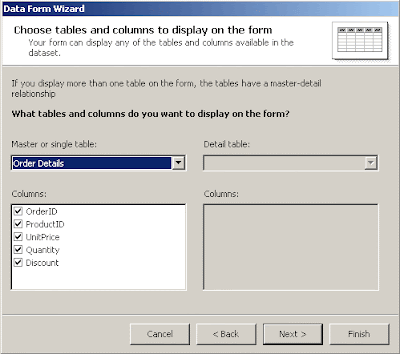
This pane allows us to display columns from more than one table by establishing a master-detail relationship. Since we are working with one table, click next on this window. Clicking next takes us to a pane like the image below.
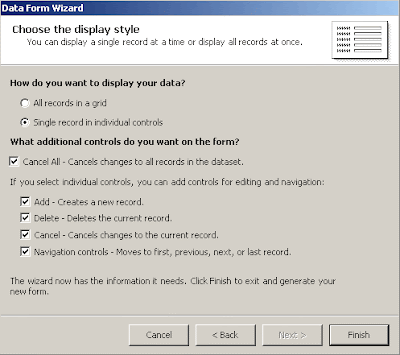
This pane allows us to choose the display style for data. By default all the records are set to be displayed in a data grid. Here, select the radio button which says "Single records in individual controls" which will unlock all the checkboxes. Uncheck the check box where it says "Cancel All" and click finish. Clicking finish adds the Data Entry Form with all the required textboxes and navigation controls (buttons). The image below displays that.
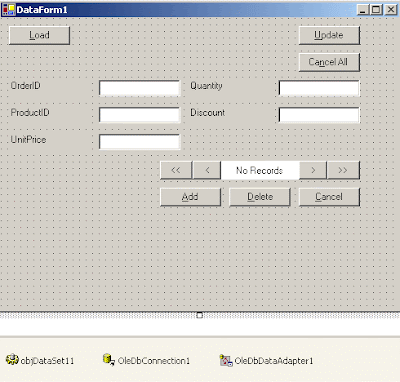
Run the form and click the Load button located at the top of the form to load the data into the form. Using the navigation controls you can move to the next record, last record, previous record and the first record. You can also enter/delete/update data into the table. Type text in the textboxes and click the insert button to insert data into the table or select a record and delete it or make changes to a record and update it by clicking the appropriate buttons. Also open the code behind file to take a look at the code Visual Basic generated for us.


No comments:
Post a Comment